


Note: - To use this root, ensure that your phone as Android 5.0.1 bootloader, otherwise you will encounter to infinite boot loops. Also, you keep in mind this root removes Knox Security and also install SUPERSU App, Busy box and 5.0.1 modem, Modded googymax n4 kernel.
Warning :-
This trick only works for the Galaxy Note 4 N910C. Rooting your device will harmful and it may lose your warranty of your device, so you have to proceed at your own risk.So tricks zeal is not responsible for any damage your device during the process.
Prerequisites :-
- USB Cable.
- Make sure that your device should have minimum 65% of battery, otherwise during the process, it will shut down.
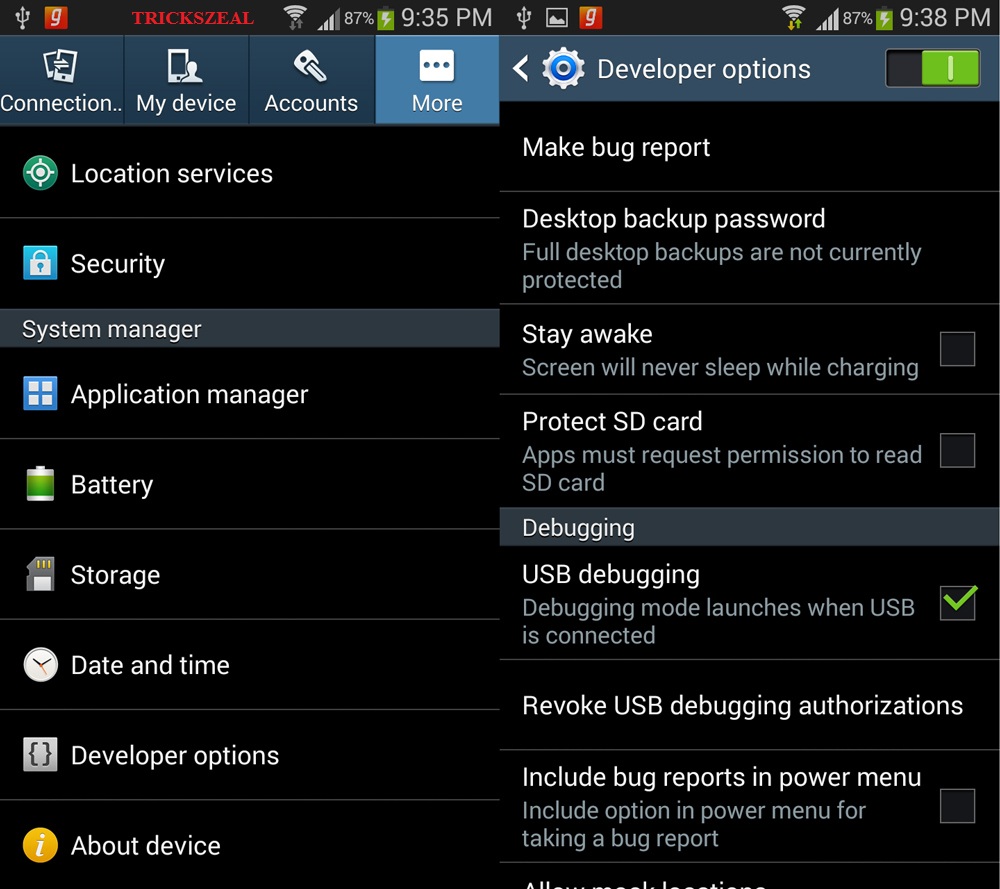
- Enable USB Debugging on your device.Settings>>About>>Build number and tap it 7 times to unlock the Developer option.Now return to Setting>>Developer option and tick the USB Debugging Check-box.

- Now install the Samsung USB driver on your PC.
- Install TWRP Recovery.
- Make sure that your device should be Backup for safe side.
Click Here For Downloads:-
Root Package >>Click Here to Download
Android 5.0.1 Bootloader>>Click Here to Download
How to Root Galaxy Note 4 N910C By Step by Step Process.
- Now Download the root package and then transfer to your device storage.
- Then Download & Extract the Android 5.0.1 Bootloader package, then you will find the folder in which there is an Odin flashable tar package & Odin binaries.
- Now Boot your device and make it into Download Mode. For this
- First Power off your Phone.
- Now Press & hold the Volume Down + Power + Home button together until you get the Warning screen with Android logo.
- Finally, Press Volume Up button to continue to the Download Mode.

- Now connect your device to PC by using USB cable.
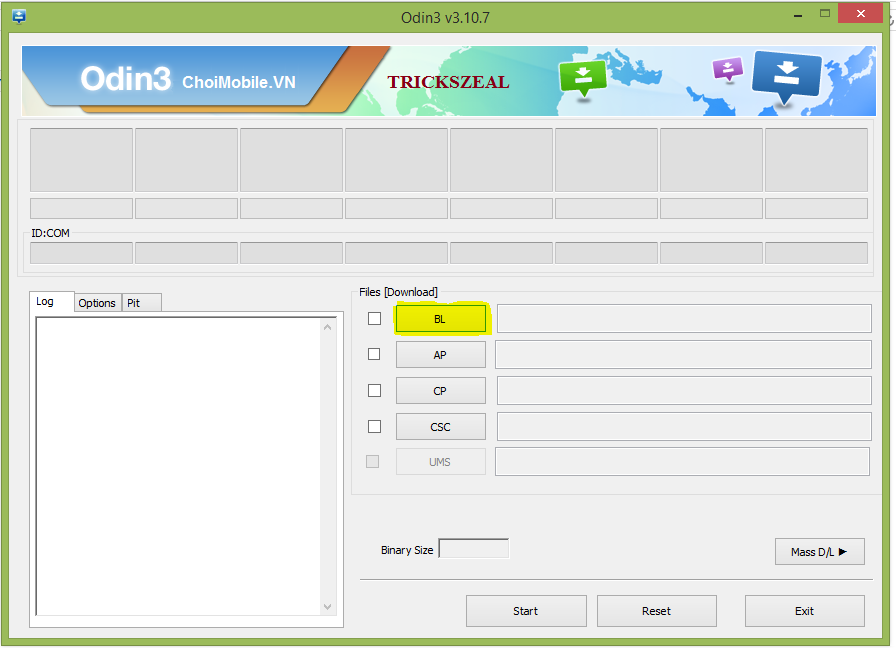
- For Odin flash tool you have to Double-click on the Odin3 v3.09.exe file to open.
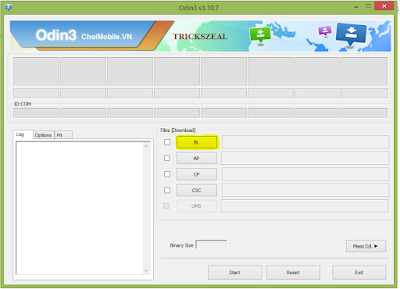
- Now you have to flash the bootloader by loading it in the BL section tool. Now Press start.
- Once the Bootloader is flashed, now reboot your device into the recovery mode. For this:- >>Power off your device. >>Now Press & hold Volume Up+ Power + Home Button together until it will show the Samsung logo and then release the Power button.Now for recovery menu, you have to Hold the Volume and Home Buttons.
- Finally, in the recovery mode, you have to simply flash the root package from the Install menu.
- Finally, Reboot your device if the Flashing is completed.
- That's it your device is now rooted successfully.

![[GUIDE]How to Enable Flash Notification Like IOS image](https://blogger.googleusercontent.com/img/b/R29vZ2xl/AVvXsEi9tQLFUhET1x95bImxQQDaQTQjZgMhAknylTtGqrGOeQYwWL3iKkXJCZIDjxFPb9dghdguSCUOSCjQqjha_xIaay_JwOjSK6YuRuGAchL990jkMOJnvwvuBjuaUI9V3tbvlGux3cIdP-M/s1600/3lfLDkG.png "[GUIDE]How to Enable Flash Notification Like IOS")
![[Guide]How to Root Xiaomi Redmi 2 With CWM Recovery Install image](https://blogger.googleusercontent.com/img/b/R29vZ2xl/AVvXsEh6Lsp-zrC3SfX67MIKleUKbqNeI8hLiAInUdzjF0cw2S-DsTQw_-4XYNeD-cHOEb1knzDpEn1kgL3Z0vxF-W1iwNd6rLlMRiLdXz1srLZK4acxXd3DyGUCHXicLZ25vLlJuZNqhezh2s0/s1600/maxresdefault.jpg "[Guide]How to Root Xiaomi Redmi 2 With CWM Recovery Install")
![[Guide]How to Root Xiaomi Redmi 2 With CWM Recovery Install image](https://blogger.googleusercontent.com/img/b/R29vZ2xl/AVvXsEgrrUF_z5vgERsT0ojzEh5CY60FZZ64ojpvf1r6zAQGo2waFi2-XBK95g3bW6DqJXtIQizLBL8PJSlW63N1Tn4GVUhXmOeKQ88aNIA1rs0u6v-hrMrRaosuTN8WhbjKurDBFvauO0uqwjA/s1600/Adb-and-Fastboot-Tools-For-Redmi-2.jpg "[Guide]How to Root Xiaomi Redmi 2 With CWM Recovery Install")
![[Guide]How to Root Xiaomi Redmi 2 With CWM Recovery Install image](https://blogger.googleusercontent.com/img/b/R29vZ2xl/AVvXsEjG-kF95anXkhzuRqB2AOFBl5UikPHQbyka_jWTHLYxZxCMoKqdyne8tq2GTlYljOr00qz9F6Yc4VL5CH1uQfgHqbs7frdZwSPyzGk5agnaVAyAomZjm7GfMIvdswl7wQQJKDz_J7TJuF0/s1600/Opening-adb-command-prompt.jpg "[Guide]How to Root Xiaomi Redmi 2 With CWM Recovery Install")
![[Guide]How to Root Xiaomi Redmi 2 With CWM Recovery Install image](https://blogger.googleusercontent.com/img/b/R29vZ2xl/AVvXsEjFb_mIIhNd-nqYqmdxlPvcFz94Eww_Hg5e2CxOuPyf8rLEzZs8d4NcQOhI-as_8Sbbdpgv-HMIWEQJv1jOTziWMz3HN6y1lxc5coQXrhmBXZzAocfUT6iBL0mK-C8-CQ6eVAUdHNL_MB4/s1600/Fastboot-commands-with-CMD.jpg "[Guide]How to Root Xiaomi Redmi 2 With CWM Recovery Install")

